DIY Paper Mache Clay Wall Clock
 Join us to create a giant paper clay wall clock from card board boxes, newspaper, and simple paper mache paste.
Quick List
Cardboard box
Recycled Newspaper
Masking Tape
Paints and Paint Brushes
Glue Gun (optional)
H20 and Rags
Clock Hands and Motor
1 Creating Your Art brush Armature
Start by drawing a template onto cardboard and cutting it for a wall clock base, you will need 2 for the front and back. Cut your cardboard into whatever shape you would like your clock to be.
Place some type of spacer between the cardboard for the look that you see in the video.
Clock Movements (motor)

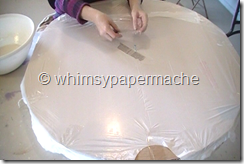
Cover your wall clock armature with a plastic bag; this will help prevent the cardboard from warping.
2 Paper Mache Strips and Paste
Cover the art brush with paper mache strips dipped in your homemade paper mache paste. If you are going to finish your clock with paper clay you will need to apply 1 layer of newspaper strips dipped in paper mache paste over the entire clock.
 Your clock must be completely dried before adding more wet paper mache strips (see note) or paper clay, which ever you wish to use.
Once your 1 layer of news strips have dried Cover the entire clock with 1/4 inch layer of paper clay and let that completely dry before painting.
Note: If you are NOT going to cover with paper clay you can cover with more paper mache strips. Start by applying 3 to 4 layers of paper mache strips and let it completely dry before adding more strips. After these strips have dried continue using paper mache strips and paste to cover your clock with at least 10 more layers.
All 10 layers does not have to be done in one setting but once you stop for the day the giant clock must be allowed to completely dry before starting a new paper mache stripping session. Below you will find the recipes and steps.
Quick Link to Paper Mache Paste Recipe
If you need once the clock has dried you can lightly sand with sandpaper and wipe off.
3. Paint Your Wall Clock
 Paint a white coat of paint on your clock to give you a white canvas for painting on. I used white interior latex paint as my base coat.
Once the base coat as dried paint with acrylics anyway you like. Let this completely dry.
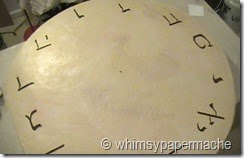
You can purchase the numbers for your clock or paint them, paint them in any language you like, it’s your special clock. I am so excited to have a Hebrew faced clock myself.
You must seal your paper mache pieces with varnish for protection. Varnish comes in a spray can in gloss or stain, spray on 3 to 4 coats and let it dry.
Follow the instructions that came with your clock hands and movements to wrap it up.
Completed
Now you know one way to make giant paper mache wall clock, a favorite decorative accessory.
I hope you have been inspired to create your own Paper Clay Wall Clocks and would love to see photos.
We would love to hear from you at the studio, you can leave your suggestions and comments below.
Link to our website and article with photographs:
© WhimSyPaPermAche.com 2015
New Videos Every Friday
